Starting My First PC Build

NaomiLynn

Casual
So i'm going to be taking a little hiatus from playing anything due to the inevitable thermal shutdown every time i try to play anything on my laptop, even on the lowest settings possible for every game and a little lap fan thingy to try and cool down the laptop. I have already purchased the main small components and case for my build and after this paycheck for the end of the month and dropping another 1.2k on parts on top of the first 1k i should have everything i need to complete the minimum needs of the build.

This is my end game goal: http://pcpartpicker.com/p/Y76Q4D

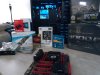
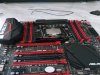
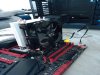
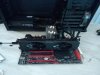
I have already purchased the: case, motherboard, RAM, CPU fan, sound card (which i found out after it shipped that i didn't need it), hard drive, and optical drive.

At the end of this week i plan on buying the : 1st GPU, CPU, Power Supply, and Operating system. (if i have extra money i will get the keyboard and 1st monitor too)

This is all just to start off my build and get me into figuring out how to put computers together since I've never actually done it before. After I get it all set up and figured out, then I will buy the extra GPU, Monitor, and maybe even a SSD to boot the OS from when i pay off my credit card.

I may work on radars for my military MOS, but I don't exactly understand everything about this stuff. So if you guys give me comments about it, talking about other computer parts lingo, I won't truely understand what your saying haha. With my job its really just "oh the phase shift driver card isn't working, ok pull it and put a new one in and see if that fixed the problem."

All and all, any tips and tricks on how to organize the cords, or what else extra i may need is still greatly appreciated even if i don't understand the first time and make you explain it further. I used www.PCPartPicker.com for a reason lol so it could show me things that were compatible with each part i chose. (started with the motherboard)
 

little P

Super Mod
Good luck with it mate, I built my first PC a couple of years ago (wow has it really been two years?!?) and it was a lot of fun to put together. It's had a few upgrades since then (More RAM, some upgraded fans, I put a G1 970 in there and I now have a Gigabyte G1 980Ti on it's way) and has never let me down.

I made a thread about it here which may or may not be helpful.

I'm sure if I can do it you'll nail it ;)

p's top tips: Don't use magnetic screwdrivers, WD40 or junior hacksaws during the build. I got away with it but I think I was lucky :p

Be sure to document the build and post here :)
 

tmtm

Admin
1. Read all of the installation documentation that comes with each part and understand it before you start jamming it in.

2. Take your time.

That's it!
 

Kenadian

Staff member
Site Admin
It looks like a great system but I seriously think you're wasting money with SLI. Based on experience all you're going to get from it is headaches and heat; it's not worth it IMHO.

If you want to spend the money then get a Titan.

Aside from that, don't build on carpet and make sure you get fingerprints on nothing. I actually wear surgical gloves when I put my PC's together just in the off chance I'm carrying a static charge as well.

I'd also shy away from using magnetically charged tools such as screwdrivers.

Will something happen if you use them, probably not, but why take the chance?

Good cable management is your friend so keep them clean and tidy.

Lastly for the CPU fan, definitely use a premium thermal paste. Remember when applying that less is more so a little drop in the middle of the CPU is all you'll need (make sure to read and understand the instructions).

PC's these days go together like Lego, you shouldn't have any issues if you take your time.
 

Daunt

MLG Pro
Great advice Ken.

I dunno about anyone else but I always do an out of the case build before placing everything properly in the case for good. There's always a small chance you may get a part that needs to be RMA'd, or it was damaged in shipping. This is a great way to make sure everything works good so you don't put everything away all perfect and then realize something is wrong and have to tear it all apart again.
 

Engnr

Moderator
Been building my systems for well from the beginning. I went water cooling this time around, makes things real quiet and the systems are straight out of the box. Wanted to try something new, food for thought. Also, where is your solid state drive? Again wanted something new, makes for a quick boot-up.

The most nerve wracking part of any build, attaching the cooling to the CPU. The most frustrating, getting the thing to initially boot-up.
 
E

ElektroVodka

The thermal paste is where a lot of people screw up.
All you need is a drop the size of a rice grain, anything over that actually hurts the cpu in the long run as the thermal conductivity isn't going up when you put more paste on it.
 

Kenadian

Staff member
Site Admin
I dunno about anyone else but I always do an out of the case build before placing everything properly in the case for good. There's always a small chance you may get a part that needs to be RMA'd, or it was damaged in shipping. This is a great way to make sure everything works good so you don't put everything away all perfect and then realize something is wrong and have to tear it all apart again.
This is what lioneltechtips (sp?) does (the NCIX guy) and I think it's a terrific idea. I've not done it yet but will start to embrace it in the future.

I'm a bit clumsy though so I'm always afraid I'm going to drop something :icon_redface:

He typically does this on top of the Motherboard Box I believe.
 

Daunt

MLG Pro
This is what lioneltechtips (sp?) does (the NCIX guy) and I think it's a terrific idea. I've not done it yet but will start to embrace it in the future.

I'm a bit clumsy though so I'm always afraid I'm going to drop something :icon_redface:

He typically does this on top of the Motherboard Box I believe.
Yep That's what I did! There was hardly a cooler experience than putting it together that first time on top of that box, then using a screw driver to jump start the PC by touching the two pins and seeing the motherboard splash show.
 

little P

Super Mod
+1 for the CPU being nerve racking... I also used a tiny blob of paste as per the instructions and have never had any problems.

Re: the GPU a 980Ti may be the better choice imo, then SLI it later. No point going for a 980 over a 980Ti really.

I've always been curious about water cooling, what system do you have in there Engy? Any pics for us?
 

NaomiLynn

Casual
thanks everyone for the support and advice, yea i realized that about the ssd before i seen all these replies, picked one up for 40$. also got a tool set that came with an esd strap, only problem is i think it comes with a magnetized screw driver. yea I've been contemplating doing an external build before doing the internal. I watched all of newegg.com's videos on the entire building tutorial. and what i have to do after the build for the initial start up with drivers and such. I ordered all the parts today, got free 2day shipping but it won't all be here till monday sadly. i was praying it would come on saturday :(. anyway, when i start doing the build i will take some periodic pics as I'm getting it all set up.
 

little P

Super Mod
I had the opposite actually, I was told my 980Ti would arrive this Monday coming and it arrived unexpectedly yesterday :)
 

NaomiLynn

Casual
So the build is complete and everything works, downloading and installing all my games and such tonight. Will upload all the pics tomorrow probly, too tired from combatives and work to do it tonight. and before anyone says anything, YES I KNOW the cable management skills needs some work lol. was just trying to make sure i plugged everything in the right spot and that everything was actually plugged in while hiding them as much as i could.
 

little P

Super Mod
Congratulations! Look forward to seeings the pictures :) Feels good when you turn it on and it works eh?
 

NaomiLynn

Casual
lol yea p it deff did, finished the external build and was aww fuck cuz it didnt splash screen right away and restarted like 3 times first then it finally popped up and i was like YES!!!!! lol

daunt: everything that was on my starting list minus the keyboard, monitors (using the 65"tv right now) and second GPU. bout to hook up my phone and start posting the pics.
 

NaomiLynn

Casual
ok so here i have positioned every part that i was putting into the build in the same pic. what you see inside the case is the newegg video on youtube that i had playing and kept pausing in the background so i could see what all i needed to do while i was doing it.
img_20151102_164738.jpg
Started off by installing the powersupply into the case and plugging it into the wall but making sure it was off. Did this to make use of the true ground on the power outlet, then hooked my ESD strap to the frame and went to work. Yes i mounted it on the bottom, i thought about mounting it on the top, but that would cause me to lose the fan that came mounted in the top of the case so i decided against it.
img_20151102_172556.jpg
Next step was beginning with the motherboard, installing the CPU. God I don't know how many times i thought i broke it during the CPU fan installation lol.
img_20151102_172548.jpg
Onward onto the notorious CPU fan. Put very little thermal paste (master cooler that came with the fan) and spread it around as well as i could without adding more. Finger in corner of bag technique. (was using the newegg video to work along side)
img_20151102_182047.jpg
Finally got the CPU fan done and so it was onto the easy stuff, plugging the 4 8gb a piece RAM in, and the GPU (gtx 980). Then plugging in all the power cords and such to the power supply and components for the test boot. It was pretty nice really because the mother board had a start and reset button on it, i did not have to short the power pin to ground to turn it on at all.
img_20151102_190447.jpg
Got the splash screen and it was already like 1900-1915 hours (started build at 1600)...realized i didn't have a keyboard lol. loaded up the wife and dog in the car and drove to walmart to buy a cheap 15$ wired keyboard so i could finish it all that night. Came back (after eating dinner finally) and started putting everything inside the case and attempting to figure out what each cord went to. Still unable to figure out where the hell i was supposed to plug the 2nd front port usb 2.0 plug in at because the mother board manual listed it in one spot and it was really the plug for something else. Also have no idea what the 1394 plug is or w/e those numbers were. case had it marked and labeled what each pin was but it was not in the mother board manual so i couldn't figure out where to plug it in. hence there are two plugs in the case that i never plugged in and are tucked away somewhere lol. And like i said before, yea i know, cable management lol.
img_20151102_234321.jpg
Got a pic of the front, power light is too damn bright, but you can see the Over Clocking tool that came with the mother board mounted in the front top slot, and the cheapo disc drive mounted in the 2nd.
img_20151102_234343.jpg
And finally the, slightly cleaned up but still, aftermath of the build. Opening all the bags and trying to find out what goes where lol. Still have to sort through and figure out how to organize my boxes with the extra pieces and which ones i need/want to keep. Been too tired to do it thanks to Combatives level 1 all week from 0600-1200 then getting an hour for lunch and going right back to regular work from 1300-1700 or later. Probly get that taken care of saturday or sunday after i get my beauty rest.
img_20151102_234405.jpg
 

Twitch

Latest posts

iRacing Special Events 2026

ROAR: LMP3, GT4, Touring
  ~ Jan 9 - 10
Daytona 24: GTP, LMP2, GT3
  ~ Jan 16 - 18
Bathurst 12: GT3
  ~ Feb 20 - 22
Sebring 12: GTP, LMP2, GT3
  ~ Mar 27 - 29

Forum statistics

Threads
3,839
Messages
48,081
Members
626
Latest member
PÉ DÍ PÁNO
Top Bottom